Integrating payment Webhooks with FastAPI in Python! - 2


In the previous post, we saw how to create endpoints to receive webhooks using FastAPI in Python. We created a simple FastAPI App to receive the data whenever a payment is made on Razorpay. If you haven’t read that post Check that out here before proceeding further.
In this post, we are going one step further. We are going to:-
- Create Schemas and Validate our data using Pydantic
- Connect our FastAPI app with a Postgres Database
- Save the webhook data in the database.
So let’s jump in
Pydantic
Pydantic is a data validation and parsing library in Python which Leverages Python’s Type Hinting. It is being used extensively in FastAPI because it has built-in JSON encoding and decoding support.
Some benefits of using Pydantic :
- Integrates extremely well with all major IDEs.
- Easy Data validation and Error Handling
- Extremely fast because it is built on RUST
How Does Pydantic work?
It basically allows users to create data models using Python classes. These classes inherits from BaseModel class in Pydantic. It can include typehints, Default Values and validation rules.
Whenever we create an instance of this data model, Pydantic checks all the fields with their respective data types and validation rules. If the data does not meet the requirements, it raises an error otherwise populates the data model with the data and returns the class instance.
Let’s install Pydantic
pip install pydantic
Let’s start with a very basic example
from pydantic import BaseModel

class dog(BaseModel):
    name: str
    age: int

dog1 = dog(name="Joey", age=3)
print(dog1)
Output
name='Joey' age=3
from pydantic import BaseModel

class dog(BaseModel):
    name: str
    age: int

dog1 = dog(name="Joey", age="3")
print(dog1)
print(type(dog1.age))
Output
name='Joey' age=3
<class 'int'>
As you can see in the example above, it automatically converted the string “3” to integer 3.
Let’s look at another example
from pydantic import BaseModel

class dog(BaseModel):
    name: str
    age: int

dog1 = dog(name="Joey", age="Three")
print(dog1)
print(type(dog1.age))
Output
    dog1 = dog(name="Joey", age="Three")
           ^^^^^^^^^^^^^^^^^^^^^^^^^^^^^
  File "pydantic\main.py", line 341, in pydantic.main.BaseModel.__init__
pydantic.error_wrappers.ValidationError: 1 validation error for dog age
value is not a valid integer (type=type_error.integer)
Here it gave a validation error that the “age” is not a valid int.
PostgreSQL
PostgreSQL, also known as Postgres, is a robust and feature-rich open-source relational database management system (RDBMS). It offers advanced functionality, scalability, and reliability, making it a preferred choice for many businesses and developers worldwide.
Installing PostgreSQL
It’s a very simple process, you can find all the details here.
Creating a Database
Now we will create a Test database inside postgres so that we can store our data in it.
Follow these steps
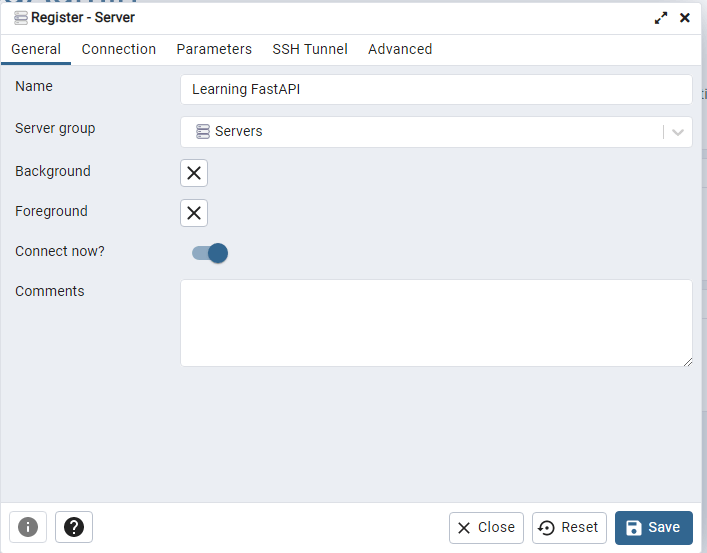
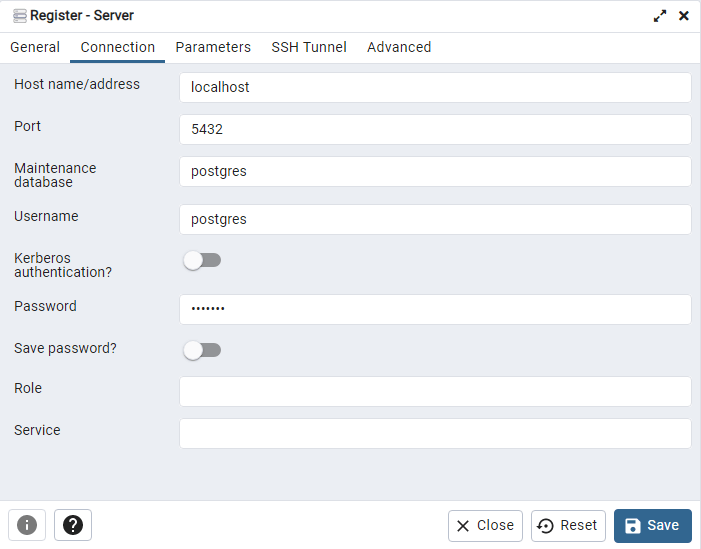
- Open PG Admin, it’s a utility that will get installed automatically by deafult.
- Object -> Register Server, Enter any name you like (in my case I am using “Learning FastAPI”).
Enter Other details as follows :-
Host name = As we are currently deploying only on our local machine we will use localhost
Username = postgres (let’s keep it default for now)
Password = Enter the password you choose when installing the software
-
Click on save.
-
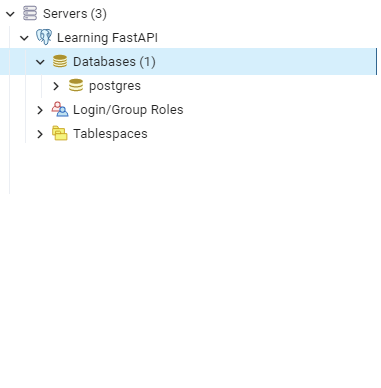
Now right click on database -> Create -> Database-> Enter database Name -> Save
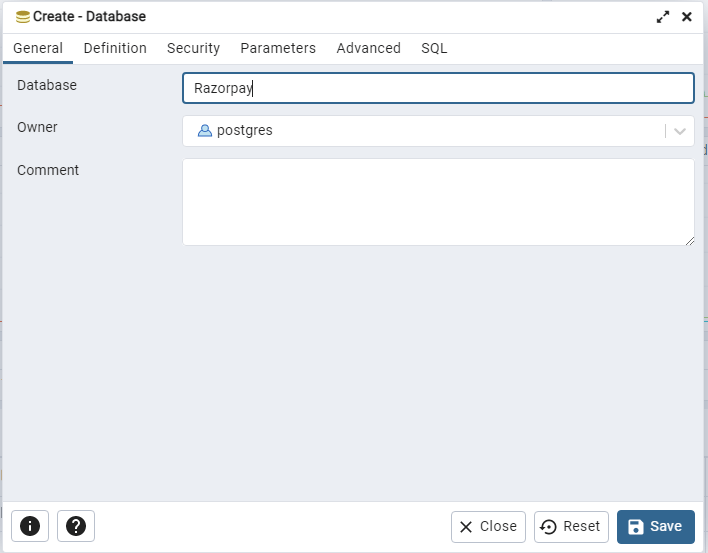
Now we have successfully created a database in PostgreSQL
Connecting the database with Python
First let’s install the libraries
pip install sqlalchemy
Pip install psycopg2
Now to talk to our database we use something known as “Object Relational Mapping”. Python does not support it by default so we are going to use a library called “sqlalchemy”.It basically converts(“maps”) Objects in code with relations in database.
We create a class in python which represents a table in database and each attribute of class representing a column and its data type. Now whenever we will create a new Object of this class, it will represent a row in the database.
The Sqlalchemy only provided the ORM capability , it does not talk to the database directly. To connect it with the database we actually need a database driver/adapter library that is specifc for the database to be used.
As we are using postgresql, we are using psycopg2 as our driver
Let’s jump into the code
from sqlalchemy import create_engine
from sqlalchemy.orm import sessionmaker, declarative_base
from sqlalchemy import Column, Integer, String, FLOAT
# This is the potgres server URL
SQLALCHEMY_DATABASE_URL = "postgresql://postgres:<password>@localhost:5432/Razorpay"
engine = create_engine(SQLALCHEMY_DATABASE_URL)
# Each instance of SessionLocal class will be a database session
SessionLocal = sessionmaker(autocommit=False, autoflush=False, bind=engine)
Base = declarative_base()
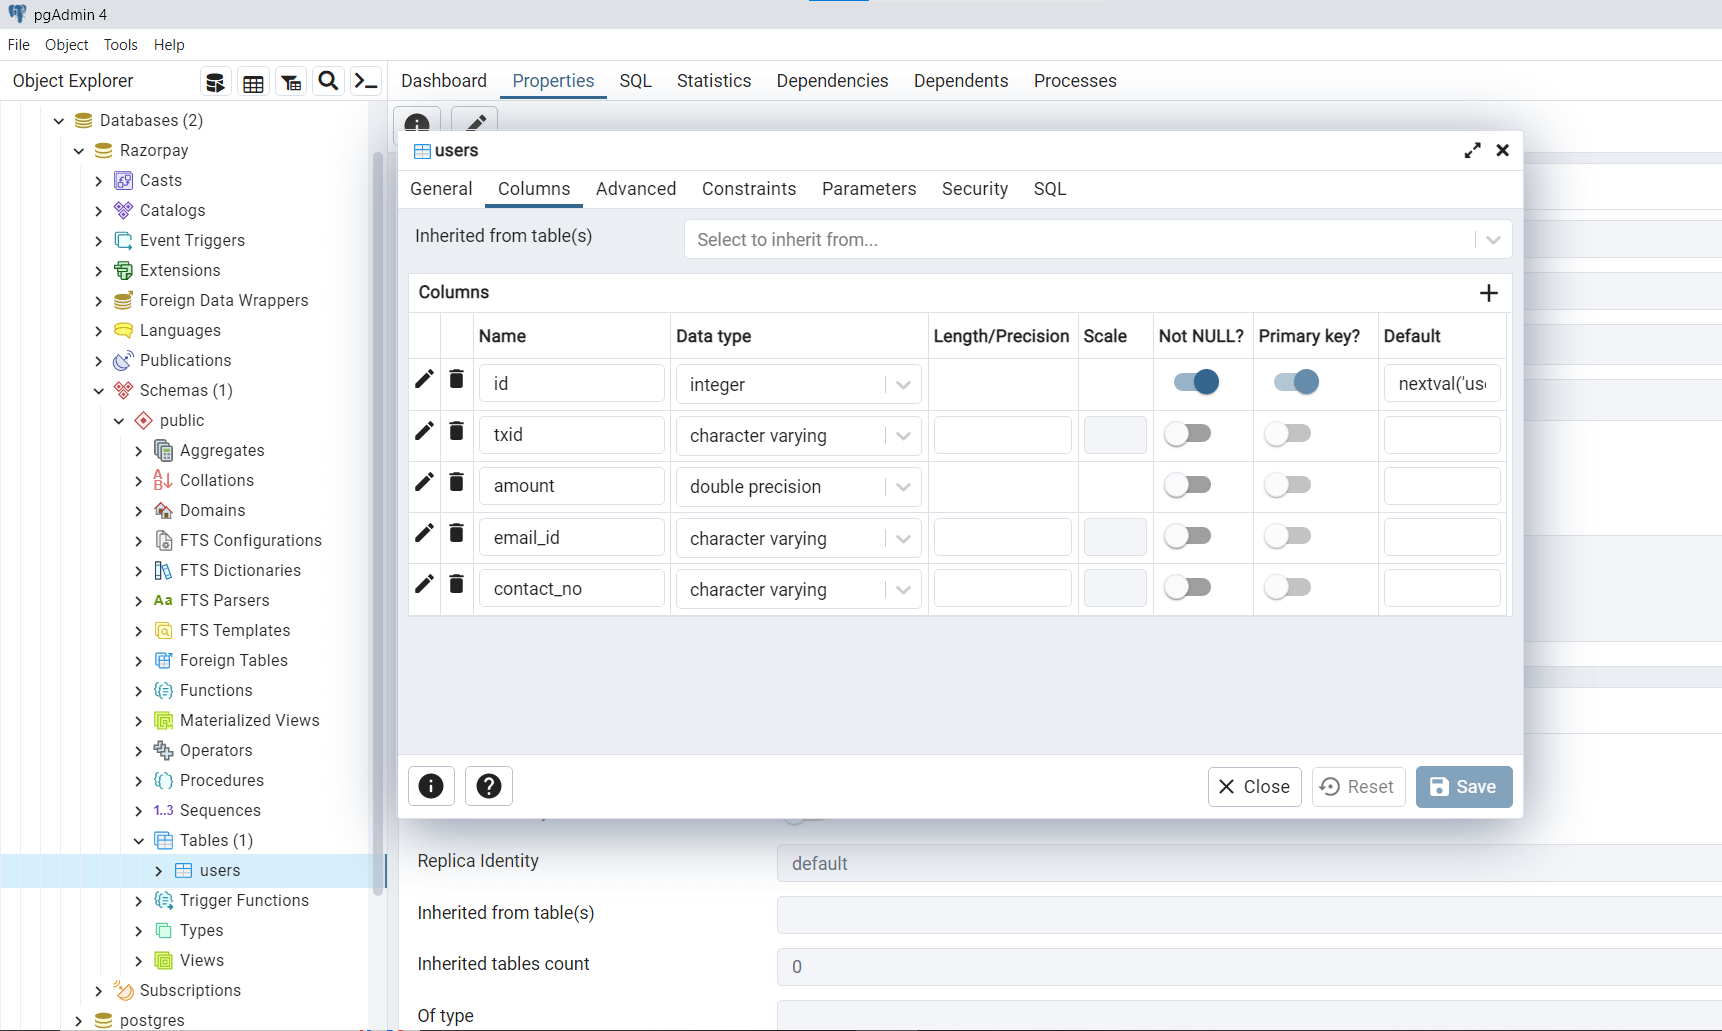
class Users(Base):
__tablename__ = "users"
id = Column(Integer, primary_key=True, index=True)
txid = Column(String, unique=True)
amount = Column(FLOAT)
email_id = Column(String)
contact_no = Column(String)
# This creates a table named "Users" in the database
def create_table():
return Base.metadata.create_all(bind=engine)
create_table()
This code creates a table named “users” in our database newly created database.
SQLALCHEMY_DATABASE_URL is the URL on which points to our database and has the following format.
postgresql://[user[:password]@][netloc][:port][/dbname]
class Users(Base):
    __tablename__ = "users"

    id = Column(Integer, primary_key=True, index=True)
    txid = Column(String, unique=True)
    amount = Column(FLOAT)
    email_id = Column(String)
    contact_no = Column(String)
This class defines the schema for the Users table, it defines the column names and their data types.
The id column is the index column, it gets incremented every time we make a new entry to the database.
Let's Run this code
Now if we see in Pg admin, we can see our newly created table with all the defined columns.
Defining Schema
Now that we know the basics and everything is working, let’s integrate everything into FastAPI.
Firstly we need to define a Pydantic model to receive the incoming data from Razorpay.
If you go to this Razorpay Docs, it clearly describes the JSON payload format in which Razorpay sends the data to the webhook. Right now we are only concerned about the payment captured format to check for successful payment.Now we have to convert this JSON to a Pydantic model for easy data parsing and validation.
We have 2 options
- Manually create the Pydantic model using JSON
- Use a automated tool to do this for us.
Offcourse we are going with the 2nd option :satisfied:
We are going to use this tool Jsontopydantic, just copy paste the JSON on the left section and it will create Pydantic Model for us.
This is our Pydantic model , save this file as schemas.py
#schemas.py
from pydantic import BaseModel
from typing import Any

class AcquirerData(BaseModel):
    rrn: str | None

class Upi(BaseModel):
    payer_account_type: str
    vpa: str

class Entity (BaseModel):
    id: str
    entity: str
    amount: int
    currency: str
    status: str
    order_id: str
    invoice_id: Any
    international: bool
    method: str
    amount_refunded: int
    refund_status: Any
    captured: bool
    description: Any
    card_id: Any
    bank: Any
    wallet: Any
    vpa: str | None
    email: str
    contact: str
    notes: dict
    fee: Any
    tax: Any
    error_code: Any
    error_description: Any
    error_source: Any
    error_step: Any
    error_reason: Any
    acquirer_data: AcquirerData
    created_at: int
    upi: Upi | None = None

class Payment(BaseModel):
    entity: Entity

class Payload(BaseModel):
    payment: Payment

class Model(BaseModel):
    entity: str
    account_id: str
    event: str
    contains: list
    payload: Payload
    created_at: int
We have defined the paydantic models or schema for incoming data from razorpay but we have to do the same for saving the data into database
Add the following Pydantic models to schemas.py
class BaseUser(BaseModel):
    txid: str
    amount: float
    email_id: str
    contact_no: str

class User(BaseUser):
    id: int

    class Config:
        orm_mode = True
Pydantic's orm_mode will tell the Pydantic model to read the data even if it is not a dict, but an ORM model (or any other arbitrary object with attributes).
This way, instead of only trying to get the id value from a dict, as in:
id = data["id"]
it will also try to get it from an attribute, as in:
id = data.id
And with this, the Pydantic model is compatible with ORMs, and you can just declare it in the response_model argument in your path operations.
Changing the Webhook Endpoint
We have to change the endpoint which we created earlier to include pydantic model
@app.post("/webhook")
async def receive_webhook(
request: Request,
RP_reponse: Model,
):
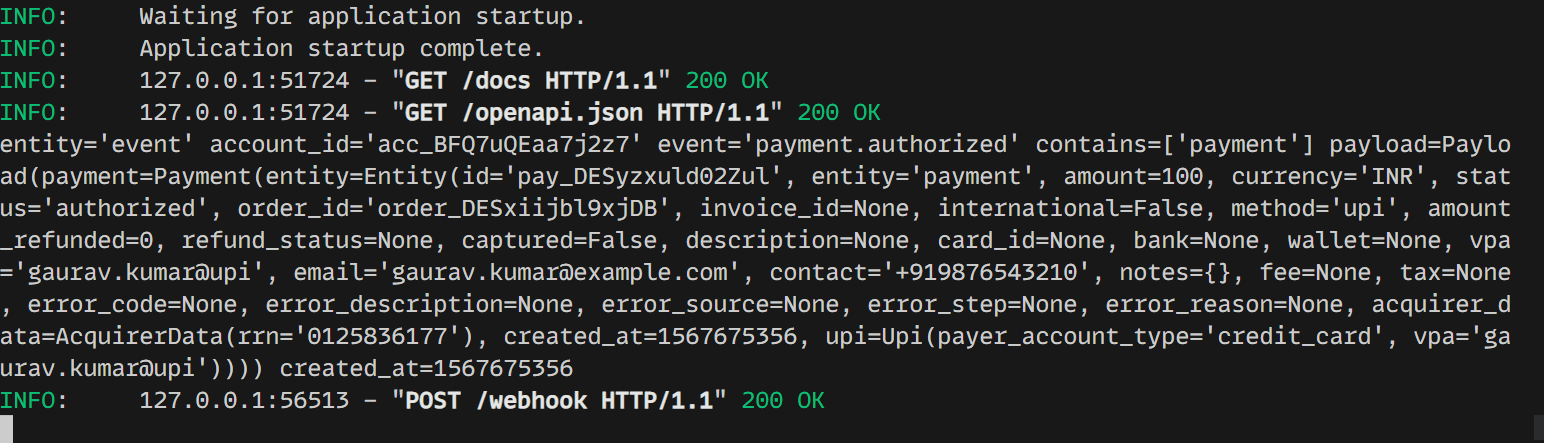
print(RP_reponse)
Here RP_response if of type Model, which is our Pydantic model
Let’s test this out, run the uvicorn server and go to http://127.0.0.1/docs
-
Click on the webhook endpoint and click “Try it out” on the right hand side.
-
In the request body , copy paste the Example JSON payload (Sasme that we used to generate the Pydantic Model to see whether our endpoint is working correctly or not here)
-
Hit on Excecute button.
Upon executing we can see that we have received the data in our print statement.
Quick Tip : You can use the docs to quick test all your endpoints, it is really useful when building a complex app.
Saving the data in Database
Now let’s save the data into database :grimacing:
async def create_user(user: BaseUser, db: Session):
    contact = Users(**user.dict())
    db.add(contact)
    db.commit()
    db.refresh(contact)
This function takes the data (as a pydantic model) and adds it to our database.
Now again run the server and go to docs http://127.0.0.1/docs and test the /webhook endpoint as showed above.
This time we should have the data in our database.
- Go to PG Admin
- Click on the database “users” and click on query tool to run the following SQL command
- Select * from users;
- Hit F5 to execute the command and you should see the table as shown below.
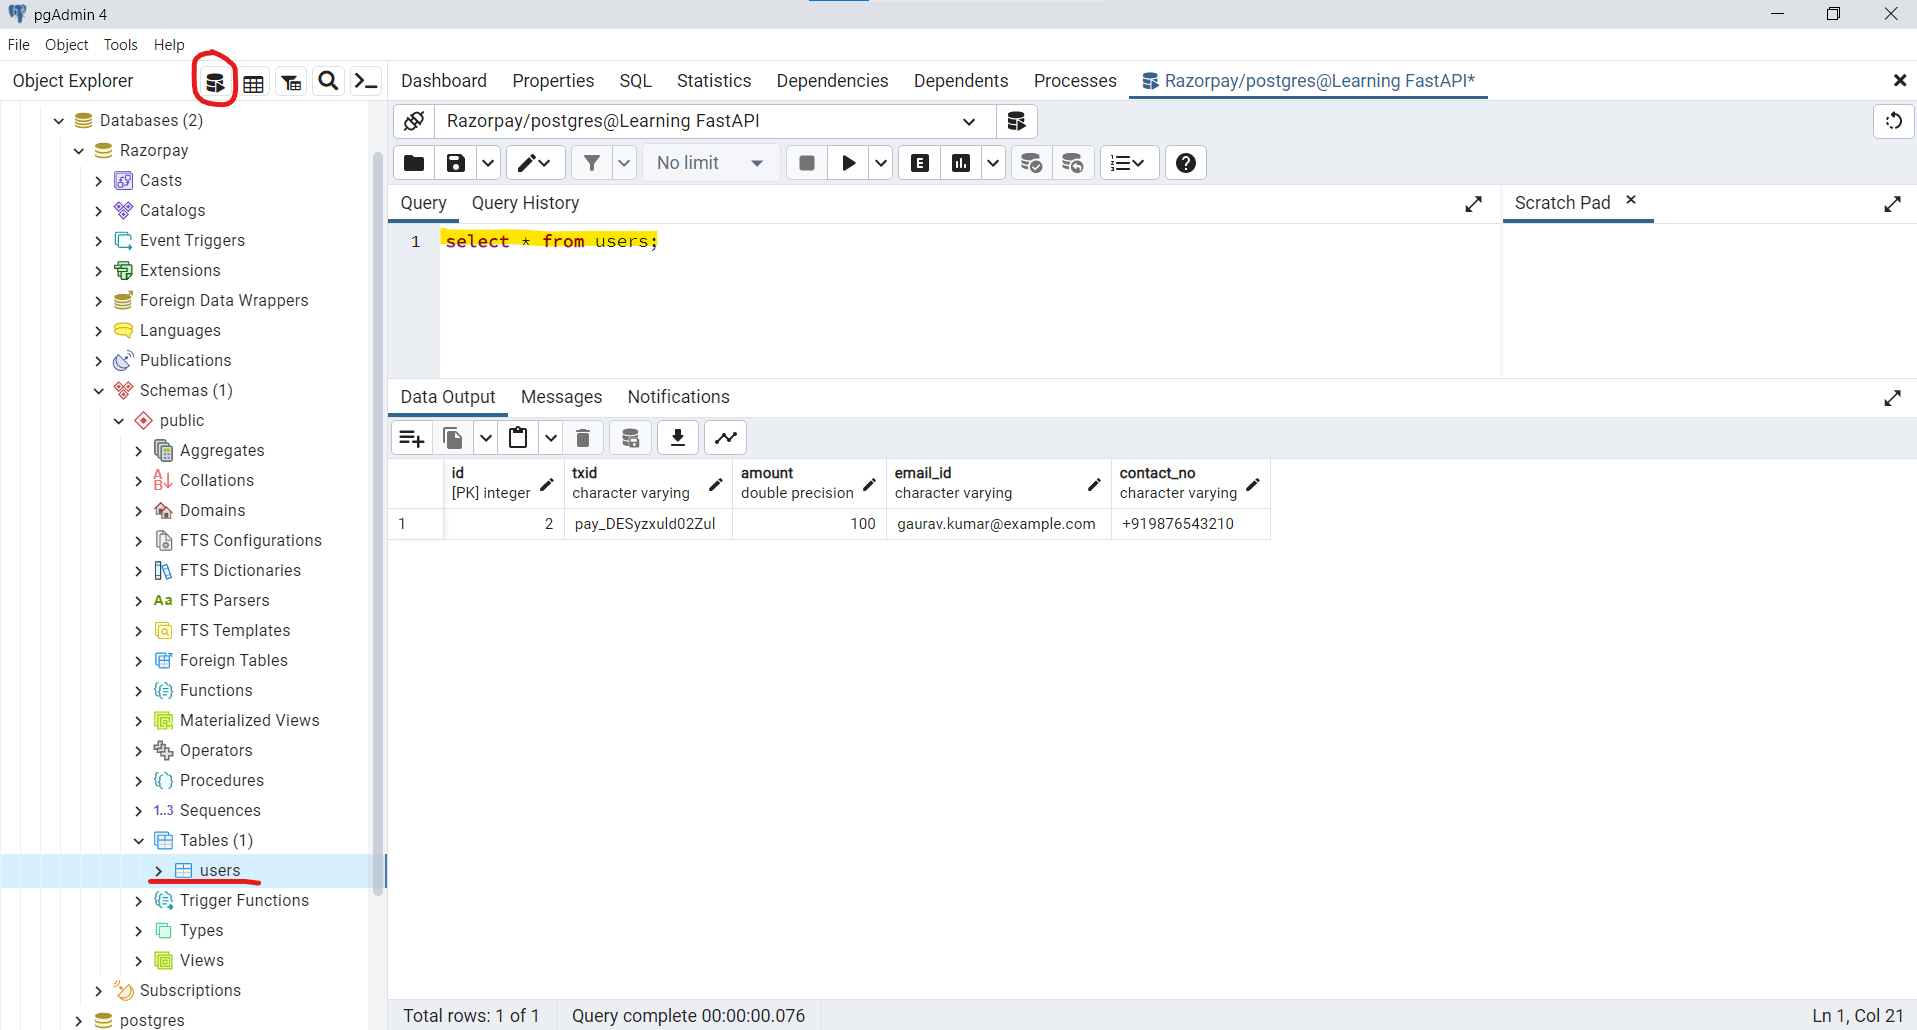
Yayy!! we have successfully managed to save data in database.
You can also test it with the payment page which we created in Part 1 it will work the same way.
If you found value in this, I’d really appreciate it if you join us and write me back.
And don’t forget to follow me on twitter @shekhu_verma
Thankyou for reading :smile: