Integrating payment Webhooks with FastAPI in Python! - 1
How to create to your Webhook endpoint in FastAPI and save the data in a database.


FastAPI is a modern web development framework used for creating RESTful APIs in Python. It is easy to use and offers extremely fast performance and documentation support.
In this tutorial, we are going to use Razorpay as our payment processing gateway to receive payment details through webhooks whenever a payment is made. In the next Post, we are going to see how to use and save this data using Pydantics and PostgreSQL database in Python.
You are going to learn
- How to Create a Basic RESTful API using FastAPI
- How to Create your own webhook endpoints using FastAPI
- How to test and setup Razorpay webhooks
- How to Triggers webhook on your local machine
But before diving in let’s understand some basics.
What are webhooks?
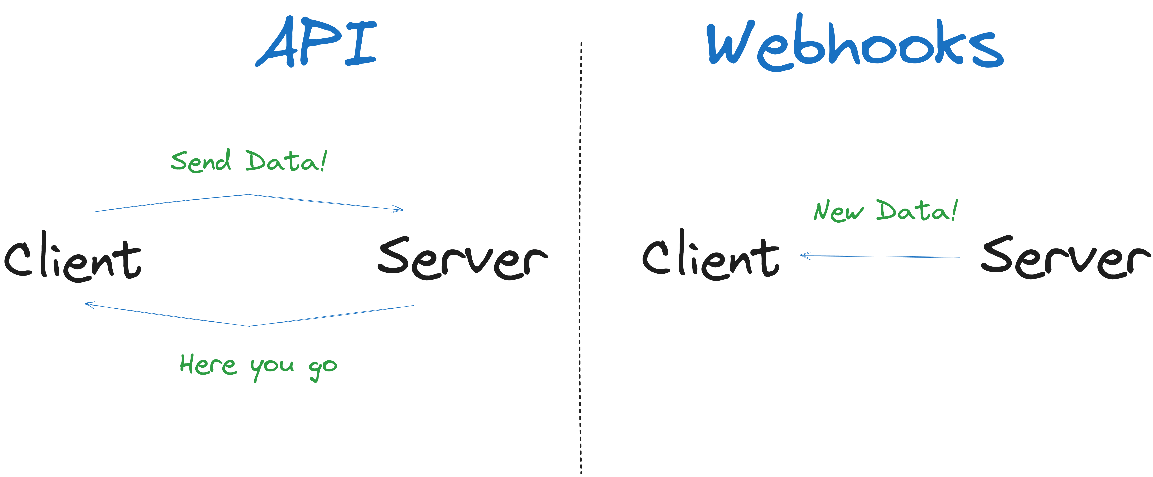
Webhooks are a way for applications or websites to send real-time data to other applications or services. They provide a mechanism for one application to notify another application when a specific event or action occurs. Instead of constantly polling or checking for updates, the receiving application provides a URL endpoint (known as a webhook) that the sending application can send data to whenever a particular event happens.
The sending application makes an HTTP request to the webhook URL with the relevant data. In our case, the sending application will be Razorpay which will send the data whenever a payment event occurs.
The receiving application (FastAPI application in our case), known as the webhook listener, receives the request and can then do whatever it wants with the data.
Webhooks are commonly used for notifications and automation tasks. For example – Generating a license key whenever a new customer makes a payment for a software product and adding the user details to a database.
Webhooks are also sometimes referred to as Reverse APIs because APIs send the data when the client requests but webhooks send the data without request from the client.
FastAPI
Let’s install the FastAPI using the following command
pip install fastapi uvicorn[standard]
I have used Python 3.11 in this project. If you are using a different version then you might have to change the code a little bit.
You can Refer to the FastAPI documentation here.
Now that we have installed fastAPI. Let's quickly create a “hello world” app using FastAPI. Copy and paste the following code in main.py
# main.py
from fastapi import FastAPI
app = FastAPI()
@app.get("/")
async def root():
return {"message": "Hello World"}
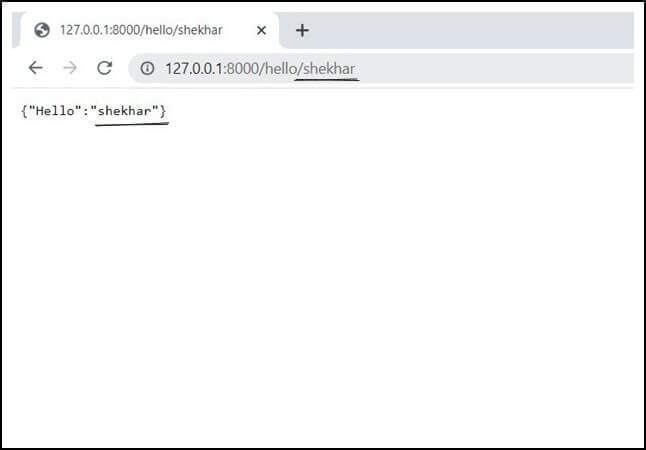
@app.get("/hello/{user}")
async def greeting(user):
return {"Hello": user}
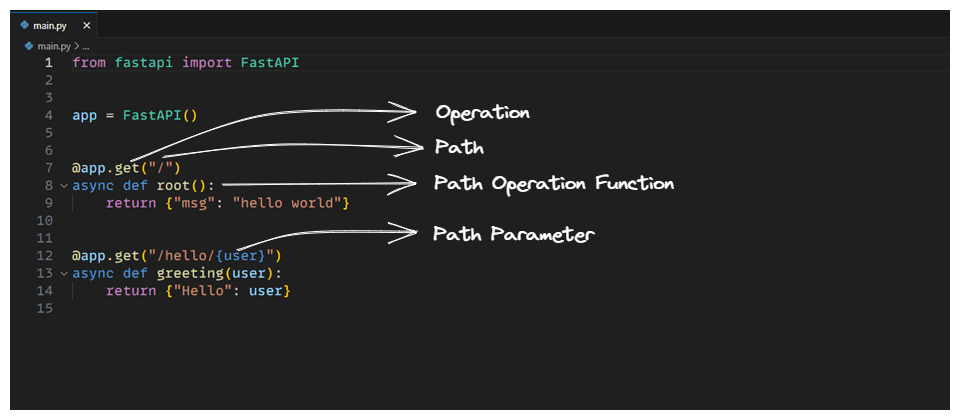
Operation – It refers to as one of the HTTP methods (GET, POST, PUT, DELETE). Normally we use
- GET – To read Data
- POST – To Send Data
- PUT – To Update Data
- DELETE – To Delete Data
The @app.get("/") decorator tells FastAPI that the function right below is in charge of handling requests that go to:
- the path “/”
- using a get operation
That’s why it is called Path Operation Decorator and the function below is called Path Operation Function.
This is the fastAPI code but it cannot run directly as a normal Python script. We need to use a server to run this app. Uvicorn is used as a server for FastAPI applications (you can use others as well but this is the most popular one).
Run the following command and you will see such output.
uvicorn main:app --reload
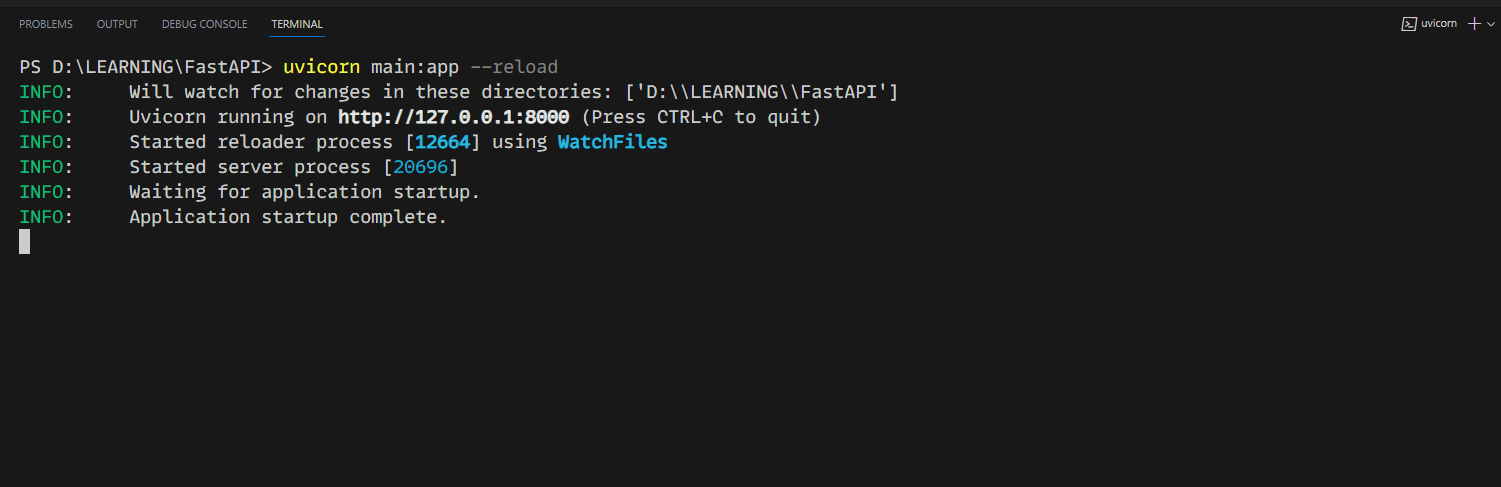
The ---reload Flag at the end reloads the webserver when you make change to your source code. It saves a lot of time in development.
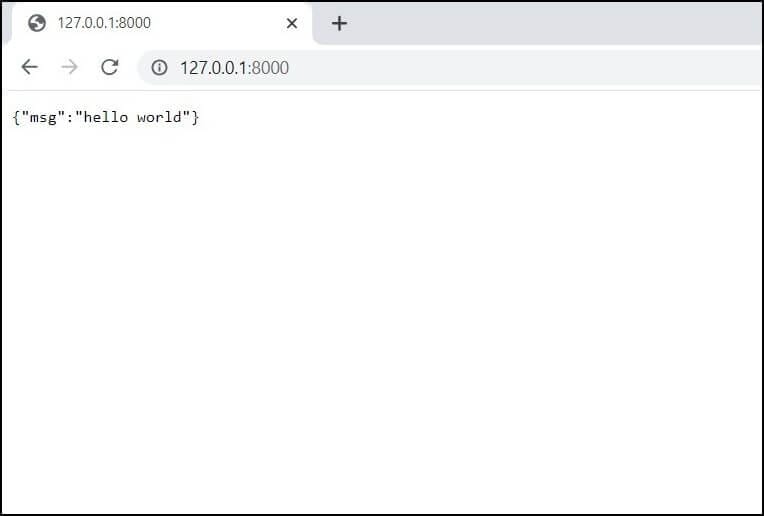
Now go to http://127.0.0.1:8000/ and you should see a similar output as seen in the figure below.
NGROK
Till this point, everything is running on our local machine but to use the webhooks, we need to expose our localhost to the internet so that Razorpay can talk to our webhook.
To do that we are going to use NGROK.
Enter the following command after installing NGROK
EDIT 1 : After a recent update with NGROK, you need to create an free account on NGROK and add the authentication token to start using NGROK
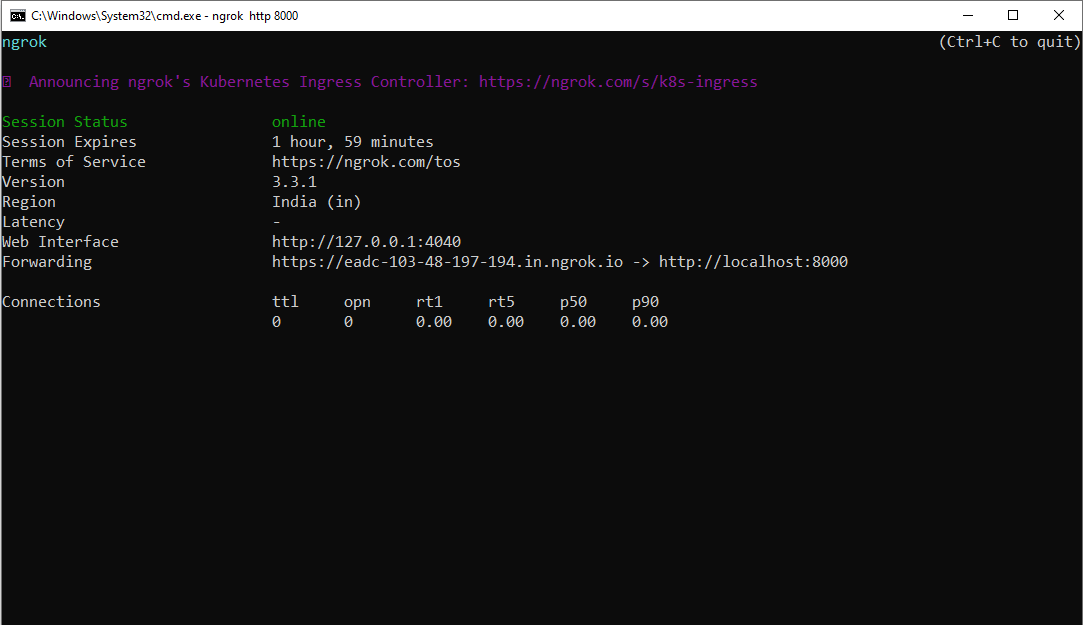
ngrok http 8000
you will see a similar output (of course your link will be different).
Now if you go the link provided by the NGROK (xx.in.ngrok.i0) you will see the same message {"msg": "hello world"}.
NGROK basically acts as a tunnel to create a link between a temporary URL created by NGROK and your localhost.
Note:- In a free NGROK account you get a temporary URL VALID only for 2 hours and after 2 hours you have to regenerate the URL. (2 hours are more than enough to do all the development and testing on the local machine).
We will use this URL generated by NGROK to receive our webhook.
Setting Up razorpay
Now that we have understood the basics, let's setup the payment webhook on Razorpay.
Create a free test account on Razorpay and create a test payment page to test our webhook.
You can find the instructions to do that Here.
Now it's time to add the webhook to our payment page.
Go to developer options on the right side, then go to webhook and enter the details as follows.
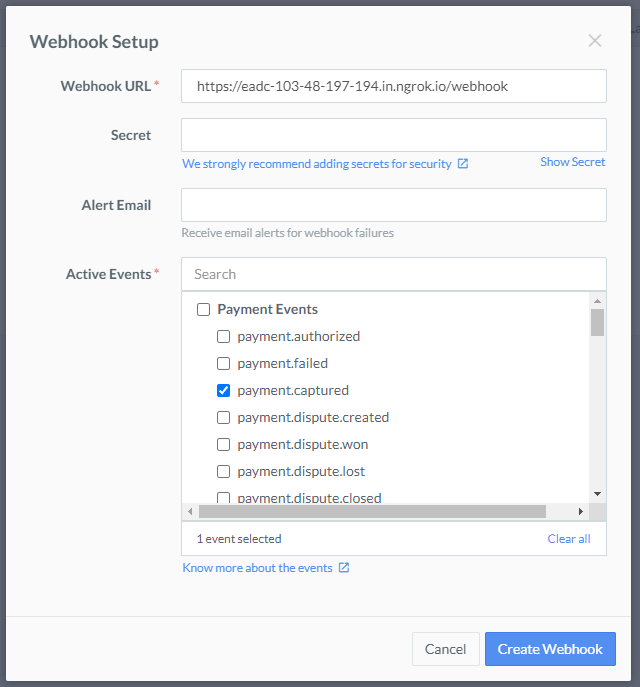
This will trigger the webhook on our URL whenever you will receive payment.
Note – Every time you will restart NGROK, you have to edit the “Webhook URL” because the URL changes. You can do this by going into your Razorpay account settings -> Webhooks -> selecting your webhook and choosing the edit option on the right side.
Creating an Endpoint in FastAPI
Now that we have setup everything, lets create a basic endpoint to receive the data sent by the webhook.
Look at the following code.
from fastapi import FastAPI, Request, Response

app = FastAPI()

@app.get("/")
async def root():
    return {"msg": "hello world"}

@app.get("/hello/{user}")
async def greeting(user):
    return {"Hello": user}

@app.post("/webhook")
async def receive_webhook(request: Request):
    result = await request.json()
    print(result)
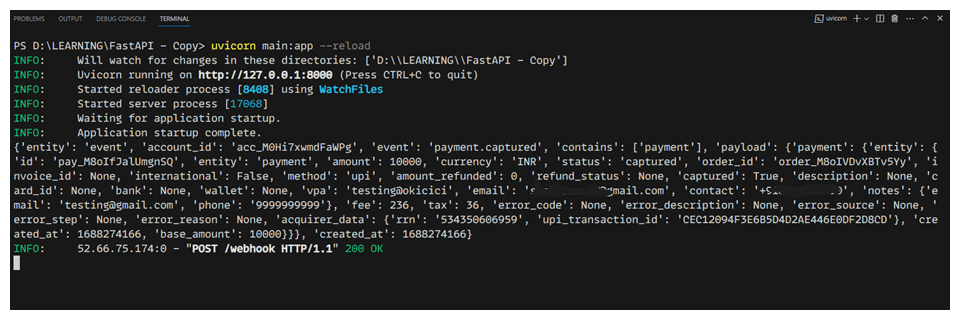
Now that we have everything setup, let's run the uvicorn server once again and make a test payment using razorpay to see whether we receive the data on our FastAPI app.

(This is a testing page, you can make dummy payments)
You can see that we have successfully received the payment data using Webhook. (I have hidden some sensitive information like my email ID and phone number).
In the next post we are going to see how to use Pydantics for data validation and PostgreSQL for storing the data in a database.
Thankyou for reading 😁
Please Follow me on twitter @shekhu_verma and feel free to connect if you have any doubts or need any help.